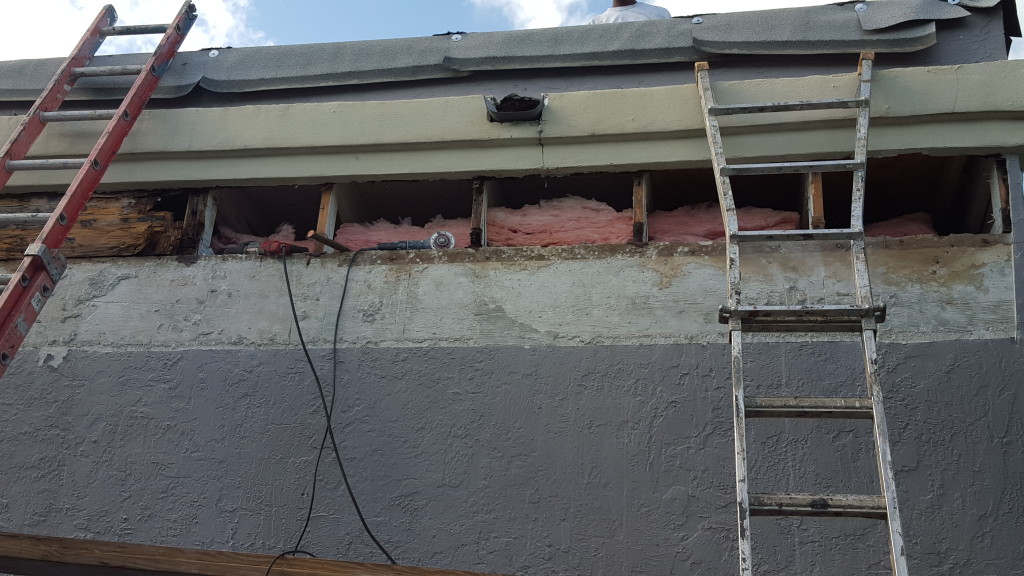
If you’re beginning to notice the stucco on the exterior of your home starting to chip away or break off, it’s important to take care of it before the problem gets worse.
Stucco is a type of cement or render that is applied to the outside of a property. It’s typically lime-based and helps to not only improve the aesthetics of a property, but also to provide weather protection.
As stucco coats the outside of your home, it is constantly exposed to the elements. Despite being study, hard-wearing, and durable, eventually Mother Nature will win. When it’s damaged, it can chip and break off. This not only makes your home look unsightly, but it also means that your home may be prone to leaks when it rains.
Maintaining your stucco isn’t just beneficial for the aesthetics of your home, it also helps to protect your home. Luckily, if you know what you’re doing, stucco repair can be a simple process.
Here’s a look at stucco repairs made simple as we share some quick and easy tips to help you repair and replace any damaged stucco on your home.
Gather the Right Tools and Materials
First and foremost, before undertaking any large DIY task at home, it’s important to ensure that you have the necessary tools and materials before you begin.
Draw up a checklist, take a look at what you already have and make a note of which items you’re going to need before you get going. A few of the most important tools and materials include:
- Ladders
- Utility knife
- Bucket
- Wire brush
- Wheelbarrow
- Drywall knife
- Drywall hawk
- Masonry trowel
- Finishing trowel
- Stucco mixture (Portland cement, hydrated lime)
- Hammer
- Safety goggles
- Breathing apparatus
- Safety mask
- Mesh
- Roofing nails
- Builder’s paper
- Gloves
- Shovel
- Misting bottle
- Rubber grout float
- Mortar hoe
- Acrylic bonding agent
- And more…
As well as the above, make sure you have some old and protective clothing and footwear that you don’t mind ruining. Stucco repair and replacement is a messy job, so don’t wear clothing or footwear that you ordinarily enjoy wearing.
Check the Weather Beforehand
Before you even think of starting to repair/replace your old stucco, make sure you check the weather forecast beforehand.
If you want your stucco repair to take and look its best, you need the weather to be on your side. If it’s too warm, the stucco will harden too quickly and turn crumbly. If it’s raining, or even if it’s humid, the stucco will be too loose and won’t dry properly. You also need to ensure that the temperature stays above freezing for 24 hours at least. Even excess wind will dry the stucco too quickly.
Basically, when carrying out a stucco repair, you want weather conditions to be perfect. Ideally you want it dry, with a gentle breeze, and temps above 40 degrees F but below 90 F. If bad weather is predicted, wait for it to pass. The stucco will need at least 24 hours to take, so don’t try rushing.
Prepare the Stucco
Before you begin applying the stucco, you will of course need to prepare it. This is a messy job, but once it’s done it should speed up the entire process.
Begin by taking your dry ingredients and shoveling them into your wheelbarrow. You will then use your mortar hoe to mix everything together. Afterwards, you should add the bonding agent and gradually add the water until it reaches a thick, yet workable consistency. Once you’ve achieved your desired consistency, you should have around 90 minutes before the mixture hardens.
Always add the water a little at a time. Adding too much will turn it into a soupy mess which will be unusable.
Remove Any Loose Material
Before you can begin applying your lovely new stucco, you’re going to have to scrape away and remove any loose material.
Using a hammer, a suitable chisel, or similar, gently chip away any loose or damaged stucco. Only remove the stucco, and take care not to damage the material underneath.
Cover the Wooden Lath
Now you can prepare the material for new stucco. That means covering the now exposed wooden lath with grade-d builder’s paper.
Make sure you cut the paper neatly up to the point where the old stucco will come into contact with the lath itself. The paper must be nice and secure as this is what is going to prevent moisture from getting inside. Roofing nails work best in this scenario, before a second layer is applied on top for added protection.
Gently Mist the Surface
To help the stucco to adhere properly, gently mist the surface with a small amount of water. When we say a gentle mist, that’s exactly what we mean, as you don’t want the surface to be too wet, otherwise it won’t stick, especially to the old stucco.
Apply, Scratch the Stucco, and Finish
Now comes the satisfying part as it’s time to apply the stucco itself.
After applying the metal mesh over the surface of the builder’s paper, you’re going to apply your new stucco.
Take your trowel and add tennis-ball sized mounds, before slinging them against the mesh. Repeat the process until it is fully covered. Smooth it out using a finishing trowel and force it against the old stucco using your masonry trowel.
After the stucco has lost its wet sheen, you can scratch it. To do this you will score the surface, just as you would to a joint of meat before roasting it. This helps to increase the surface area for better adhesion when you apply the next coat. Cover with plastic to allow it to adhere.
Gently mist the surface and apply the second coat a week later once it’s fully cured. Apply this layer in a thickness of 3/8 inch. Smooth the surface when the stucco has lost its wet sheen, cover with plastic, and leave to cure.
Three days later, apply your final finishing coat, leave at least another week to fully dry, and you’re ready to paint.


